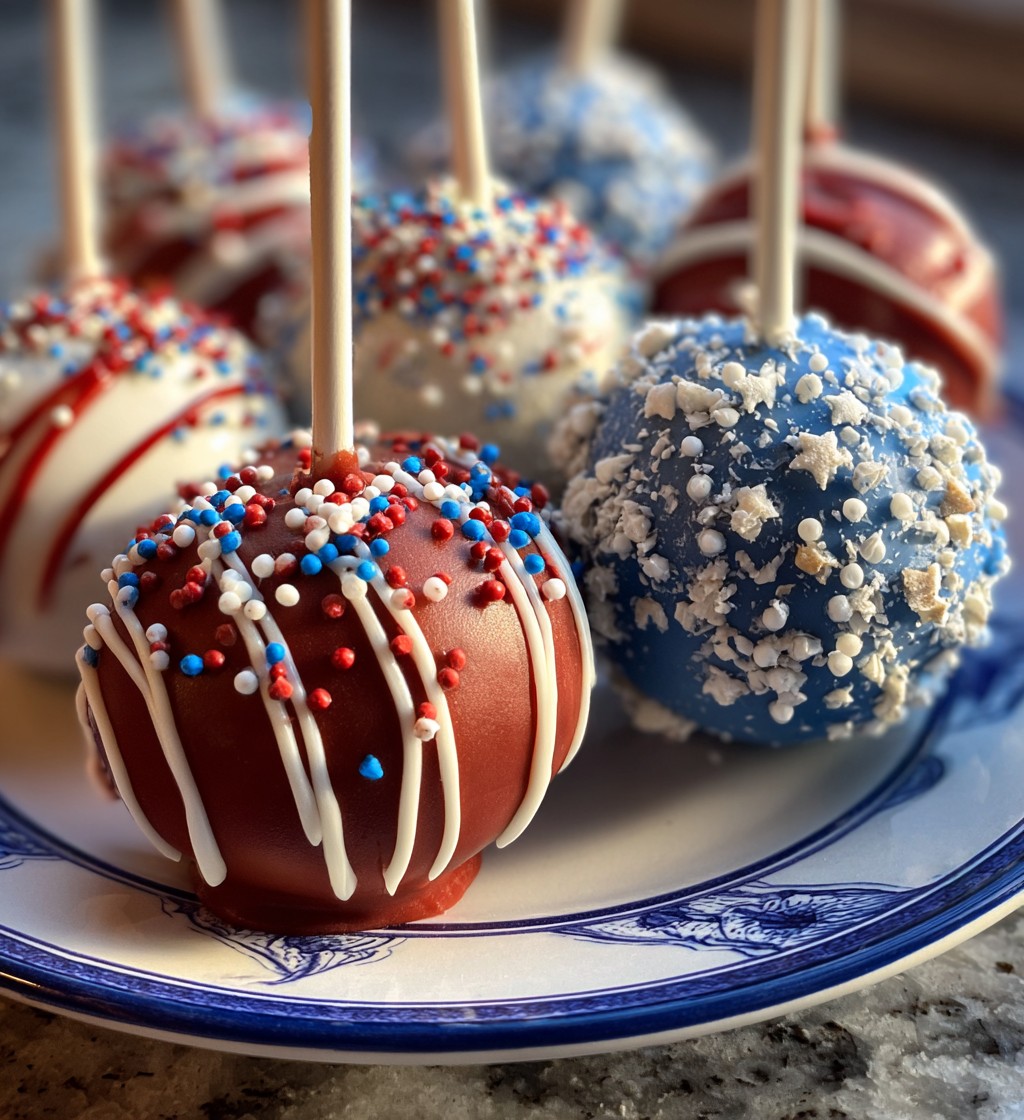
Patriotic 4th of July Cake Pops Recipe for a Festive Treat
Every summer I look forward to the fireworks, the backyard BBQs, and, of course, the sweet treats that make the holiday feel extra special. This year I’m sharing my go‑to 4th of July cake pops recipe—a fun, bite‑size dessert that’s as patriotic as it is delicious. They’re quick to assemble, look stunning on a platter, and are perfect for kids and adults alike.
Why You’ll Love This Recipe
- Bright red, white, and blue colors that match the holiday theme.
- Made with a classic vanilla cake base—no fancy equipment needed.
- Easy to customize for any celebration, not just Independence Day.
- Great for potlucks: they stay fresh for days when stored properly.
Ingredients
- 1 ½ cups all‑purpose flour
- 1 ½ teaspoons baking powder
- ¼ teaspoon salt
- ½ cup unsalted butter, softened
- 1 cup granulated sugar
- 2 large eggs, room temperature
- 2 teaspoons pure vanilla extract
- ½ cup whole milk
- ¼ cup red food coloring
- ¼ cup blue food coloring
- 12 oz white chocolate chips (for coating)
- 3 tablespoons vegetable oil (for melting chocolate)
- Red, white, and blue sprinkles
- 20 cm (8‑inch) wooden craft sticks
- Non‑stick cooking spray
How to Make 4th of July Cake Pops
- Preheat and prep: Set your oven to 350°F (175°C). Grease a 9×13‑inch baking pan with non‑stick spray.
- Dry mix: In a medium bowl whisk together flour, baking powder, and salt. Set aside.
- Cream butter and sugar: Using a hand mixer, beat the softened butter and granulated sugar on medium speed until light and fluffy, about 3‑4 minutes.
- Add eggs and vanilla: Beat in the eggs one at a time, then stir in vanilla extract. Scrape the sides of the bowl to ensure everything is incorporated.
- Combine wet and dry: Gradually add the flour mixture, alternating with milk, beginning and ending with the flour. Mix just until smooth; over‑mixing can make the cake dense.
- Bake: Pour the batter into the prepared pan, spreading evenly. Bake for 20‑25 minutes, or until a toothpick inserted in the center comes out clean. Let the cake cool completely on a wire rack.
- Crumb it up: Once cooled, crumble the cake into a large bowl using your hands or a fork. You should have fine crumbs, not large chunks.
- Divide and color: Split the crumbs into three equal portions. To the first portion, add the red food coloring and a tablespoon of milk; mix until the color is uniform. Repeat with the blue food coloring for the second portion. Leave the third portion plain for the white cake pops.
- Bind the crumbs: Add 2‑3 tablespoons of milk to each colored portion, one at a time, mixing until the mixture holds together when pressed. It should feel moist but not soggy.
- Form the pops: Scoop about 1 tablespoon of mixture and roll it into a smooth ball. Insert a wooden stick into the center, tapping the bottom to secure. Repeat until all crumbs are used—you’ll get roughly 30‑35 pops.
- Chill: Place the assembled pops upright in a styrofoam block or a tall glass, and refrigerate for at least 30 minutes. This firms them up for coating.
- Prepare the coating: In a microwave‑safe bowl, combine white chocolate chips and vegetable oil. Microwave in 30‑second bursts, stirring between each, until smooth and glossy.
- Dip: Remove a pop from the fridge, dip it into the melted chocolate, turning gently to coat fully. Let excess drip back into the bowl.
- Decorate: While the chocolate is still wet, sprinkle the appropriate colored sprinkles—red on red pops, blue on blue pops, and white sprinkles on the plain ones. For a festive swirl, you can also drizzle a second color of melted chocolate over each pop using a small spoon.
- Set: Return the coated pops to the styrofoam block. Allow the chocolate to harden at room temperature (about 15‑20 minutes) or place them in the fridge for a quicker set.
Tips for Best Results
- Don’t over‑mix the batter: A gentle hand keeps the cake light, which translates to smoother pops.
- Use high‑quality white chocolate: It melts evenly and gives a glossy finish.
- Control the color intensity: Add food coloring a few drops at a time; you can always deepen the hue, but you can’t lighten it.
- Keep the sticks dry: Moisture on the wooden sticks can cause the chocolate to slide off.
- Work in a cool room: Warm environments make the chocolate melt too quickly, leading to a dull coating.
Variations
- Chocolate cake base: Substitute half of the all‑purpose flour with cocoa powder for chocolate‑loving crowds.
- Flavor twists: Add ½ teaspoon of almond extract to the batter or fold in mini chocolate chips for extra texture.
- Gluten‑free: Use a 1‑to‑1 gluten‑free flour blend in place of regular flour.
- Alternative coatings: Dip in melted dark chocolate and finish with gold or silver edible glitter for a more sophisticated look.
Storage
Store the finished cake pops in an airtight container in the refrigerator for up to 5 days. If you need to serve them at room temperature, let them sit out for 15‑20 minutes before the event so the chocolate softens slightly and the flavor is more pronounced. Re‑heat the cake base in the microwave for 10 seconds if you want a warm, melt‑in‑your‑mouth experience—just be sure the pops are removed from the sticks first.
Print
Patriotic 4th of July Cake Pops Recipe for a Festive Treat
- Total Time: 40 mins
- Yield: 6 servings 1x
- Diet: Halal
Description
Celebrate Independence Day with our easy 4th of July cake pops recipe—red, white, and blue bites that wow every crowd!
Ingredients
- 1 ½ cups all‑purpose flour
- 1 ½ teaspoons baking powder
- ¼ teaspoon salt
- ½ cup unsalted butter, softened
- 1 cup granulated sugar
- 2 large eggs, room temperature
- 2 teaspoons pure vanilla extract
- ½ cup whole milk
- ¼ cup red food coloring
- ¼ cup blue food coloring
- 12 oz white chocolate chips (for coating)
- 3 tablespoons vegetable oil (for melting chocolate)
- Red, white, and blue sprinkles
- 20 cm (8‑inch) wooden craft sticks
- Non‑stick cooking spray
Instructions
- Preheat and prep: Set your oven to 350°F (175°C). Grease a 9×13‑inch baking pan with non‑stick spray.
- Dry mix: In a medium bowl whisk together flour, baking powder, and salt. Set aside.
- Cream butter and sugar: Using a hand mixer, beat the softened butter and granulated sugar on medium speed until light and fluffy, about 3‑4 minutes.
- Add eggs and vanilla: Beat in the eggs one at a time, then stir in vanilla extract. Scrape the sides of the bowl to ensure everything is incorporated.
- Combine wet and dry: Gradually add the flour mixture, alternating with milk, beginning and ending with the flour. Mix just until smooth; over‑mixing can make the cake dense.
- Bake: Pour the batter into the prepared pan, spreading evenly. Bake for 20‑25 minutes, or until a toothpick inserted in the center comes out clean. Let the cake cool completely on a wire rack.
- Crumb it up: Once cooled, crumble the cake into a large bowl using your hands or a fork. You should have fine crumbs, not large chunks.
- Divide and color: Split the crumbs into three equal portions. To the first portion, add the red food coloring and a tablespoon of milk; mix until the color is uniform. Repeat with the blue food coloring for the second portion. Leave the third portion plain for the white cake pops.
- Bind the crumbs: Add 2‑3 tablespoons of milk to each colored portion, one at a time, mixing until the mixture holds together when pressed. It should feel moist but not soggy.
- Form the pops: Scoop about 1 tablespoon of mixture and roll it into a smooth ball. Insert a wooden stick into the center, tapping the bottom to secure. Repeat until all crumbs are used—you’ll get roughly 30‑35 pops.
- Chill: Place the assembled pops upright in a styrofoam block or a tall glass, and refrigerate for at least 30 minutes. This firms them up for coating.
- Prepare the coating: In a microwave‑safe bowl, combine white chocolate chips and vegetable oil. Microwave in 30‑second bursts, stirring between each, until smooth and glossy.
- Dip: Remove a pop from the fridge, dip it into the melted chocolate, turning gently to coat fully. Let excess drip back into the bowl.
- Decorate: While the chocolate is still wet, sprinkle the appropriate colored sprinkles—red on red pops, blue on blue pops, and white sprinkles on the plain ones. For a festive swirl, you can also drizzle a second color of melted chocolate over each pop using a small spoon.
- Set: Return the coated pops to the styrofoam block. Allow the chocolate to harden at room temperature (about 15‑20 minutes) or place them in the fridge for a quicker set.
Notes
- Don’t over‑mix the batter: A gentle hand keeps the cake light, which translates to smoother pops.
- Use high‑quality white chocolate: It melts evenly and gives a glossy finish.
- Control the color intensity: Add food coloring a few drops at a time; you can always deepen the hue, but you can’t lighten it.
- Keep the sticks dry: Moisture on the wooden sticks can cause the chocolate to slide off.
- Work in a cool room: Warm environments make the chocolate melt too quickly, leading to a dull coating.
- Prep Time: 15 mins
- Cook Time: 25 mins
- Category: Dessert
- Method: Cooking
- Cuisine: American
Nutrition
- Serving Size: 1 serving
- Calories: 320
- Sugar: 8g
- Sodium: 420mg
- Fat: 14g
- Saturated Fat: 4g
- Unsaturated Fat: 9g
- Trans Fat: 0g
- Carbohydrates: 24g
- Fiber: 3g
- Protein: 24g
- Cholesterol: 70mg
Keywords: 4th of july cake pops recipe
FAQs
- Can I make these cake pops ahead of time?
- Absolutely! Assemble and coat them up to two days in advance. Keep them refrigerated and covered with plastic wrap.
- What if I don’t have white chocolate chips?
- You can use candy melts or melt white chocolate bars with a teaspoon of vegetable oil for the same glossy finish.
- How do I prevent the sprinkles from falling off?
- Press the sprinkles gently into the wet chocolate and let the coating set completely before moving the pops.
- Can I use a different food coloring brand?
- Yes—any gel or liquid food coloring that’s safe for baking will work. Gel colors give richer hues with less liquid.