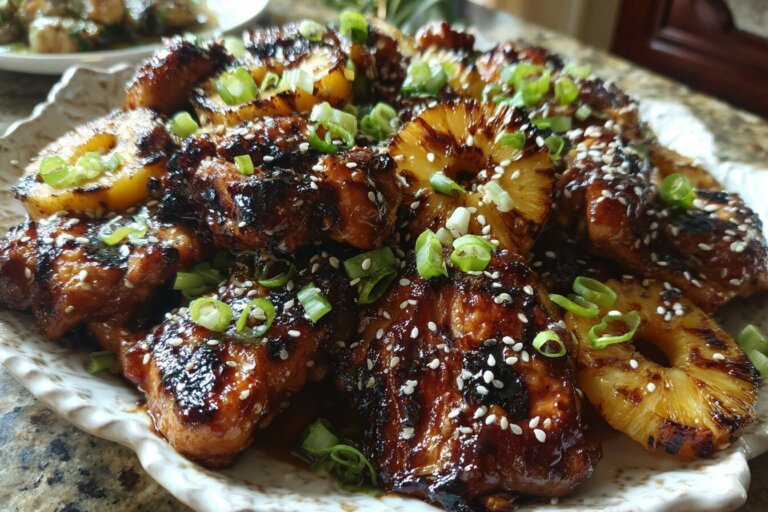

Parboiled Fried Chicken: The Secret to Juicy Meat and Ultra-Crispy Skin
We have all been there. You are standing over a pot of hot oil, frying chicken. The skin looks perfect—golden brown, crispy, and delicious. You take it out, let it cool, and take that first bite… only to discover the meat near the bone is still pink.
It is the home cook’s nightmare. You are left with two bad options: throw it back in the oil (burning the skin) or finish it in the oven (making the crust soggy).
Welcome back to Recipes Nora! Today, I am going to teach you an “old school” technique that completely eliminates this problem. We are making Parboiled Fried Chicken.
Now, I know what you might be thinking. “Boiled chicken? Noah, isn’t that going to be bland and rubbery?”
Absolutely not. If done correctly, parboiling is actually a flavor-infusing technique. Think of it less like boiling and more like a “hot brine.” By simmering the chicken in heavily seasoned water before frying, we ensure the meat is fully cooked to the bone, incredibly juicy, and infused with salt and aromatics.
Then, because the chicken is already cooked, the frying step becomes strictly about crisping the skin. You can crank up the heat to get a shatteringly crunchy crust without worrying about the internal temperature.
In this guide, I will walk you through the science of why this works, how to season your boiling water so the flavor penetrates deep into the meat, and the battering technique that ensures the crust stays put.
Let’s get frying!
What is Parboiled Fried Chicken?
Parboiling (or “partial boiling”) is a technique often used for denser foods like potatoes or ribs to soften them before roasting or grilling.
When applied to fried chicken, it involves simmering the chicken pieces in water mixed with spices, onions, and garlic until they are mostly or fully cooked. After boiling, the chicken is dried, battered, and quickly fried.
This method is popular in many Southern kitchens and Caribbean households because it guarantees safety. It takes the guesswork out of frying. You never have to wonder if the drumstick is done. If it was boiled, it’s done.
Why This Method Works
As a chef, I love techniques that reduce stress in the kitchen. Here is why Parboiled Fried Chicken deserves a spot in your rotation:
- Safety First: The biggest anxiety with frying chicken is undercooked meat. Parboiling kills bacteria and cooks the meat through.
- Juiciness: Contrary to popular belief, boiling meat (if done gently) retains moisture. The proteins contract slowly, keeping the juices inside. Plus, the seasoned water acts as a marinade that penetrates faster due to the heat.
- Crispier Skin: Chicken skin contains fat and water. Boiled chicken renders some of that fat and tightens the skin. When you fry it later, the skin is thinner and crisps up almost instantly, rather than being chewy or flabby.
- Faster Frying: Raw fried chicken takes 15-20 minutes in the oil. Parboiled chicken takes 3-5 minutes. This means your oil stays cleaner longer, and your kitchen doesn’t smell like a deep fryer for days.
- No “Bloody” Bones: Have you ever seen dark spots or blood around the bone of a fried drumstick? Parboiling cooks the marrow, preventing that unappetizing discoloration.
Ingredient Deep Dive: The Flavor Layers

To make this taste amazing, we have to season at every stage: the water, the coating, and the finish.
The Chicken
- Wings and Drumsticks: These are the best cuts for this method. They have bones and connective tissue that handle boiling well.
- Thighs: Also excellent, but they may take a few minutes longer to boil.
- Breast: I do not recommend parboiling chicken breast. It is too lean and will dry out quickly in hot water. Stick to dark meat.
The Boiling Liquid (The “Hot Brine”)
This is where the magic happens. Do not boil chicken in plain water!
- Aromatics: Roughly chopped onions, smashed garlic cloves, and sliced ginger.
- Seasoning: Plenty of salt (it should taste like sea water), black peppercorns, and dried herbs like thyme or bay leaves.
- Umami Boost: I like to add a splash of Soy Sauce or a bouillon cube to the water. This deepens the savory flavor of the meat.
The Coating
We want a crunch that rivals KFC.
- Flour & Cornstarch: A mix of All-Purpose Flour and Cornstarch (ratio 3:1) creates the crunchiest crust. The cornstarch inhibits gluten formation, making the coating light and crispy rather than doughy.
- Spices: Paprika, garlic powder, onion powder, and cayenne pepper.
The Liquid Binder
Since the chicken is cooked, we need something to help the flour stick.
- Egg & Milk Wash: A simple whisked egg with a splash of milk or water works best. You can also use hot sauce in this mix for a spicy kick.
Step-by-Step Instructions
This process requires a little more prep time than standard frying, but the active frying time is much shorter.
Step 1: The Clean and Prep

Wash your chicken (if that is your custom, using vinegar/lime) and pat it dry. Place it in a large pot.
Step 2: The Seasoned Boil
Add the aromatics to the pot: quartered onions, smashed garlic, bay leaves, peppercorns, and salt. Fill the pot with cold water until the chicken is covered by an inch.
- Chef Noah’s Tip: Start with cold water. If you drop chicken into boiling water, the outside cooks too fast. Starting cold allows the chicken to cook evenly as the water heats up. Bring to a boil, then reduce heat to a simmer. Do not boil aggressively! Simmer for 15-20 minutes. The chicken should be firm and mostly opaque.
Step 3: The Cool and Dry (Crucial!)
Remove the chicken from the pot and place it on a wire rack or paper towels. Let it cool completely.
- Why? If you batter hot, steaming chicken, the flour will turn into a gummy paste and slide off in the fryer. The skin needs to be dry and cool to hold the coating. You can even put it in the fridge for 30 minutes for best results.
Step 4: The Dredge

Set up your station.
- Bowl 1: Seasoned flour mixture (flour, cornstarch, spices).
- Bowl 2: Egg wash (eggs whisked with milk). Dip the cooled chicken into the flour (shake off excess), then into the egg, then back into the flour. Press the flour into the skin to create shaggy bits.
Step 5: The Flash Fry
Heat your oil to 375°F (190°C). Fry the chicken in batches. Since the meat is already cooked, you only need to fry until the crust is golden brown. This usually takes 3 to 5 minutes. Remove and drain on a wire rack.
Chef Noah’s Tips for Success
1. Don’t Over-Boil You are parboiling, not making soup stock. If you boil the chicken for an hour, all the flavor will leave the meat and go into the water. 20 minutes is the sweet spot where the meat cooks but retains its integrity.
2. Save the Broth! After you take the chicken out, you are left with a pot of rich, seasoned chicken stock. Do not pour it down the drain! Strain out the solids and freeze the liquid. It is perfect for making rice, soups, or gravies later.
3. The “Double Dip” If you like an extra-thick crust (like Popeyes style), dip the chicken in the liquid, then flour, then liquid again, and flour again. This creates a mega-crunch.
4. Oil Temperature Because the frying time is short, you can fry at a slightly higher temperature (375°F instead of 350°F). This ensures the crust gets crispy instantly without absorbing too much oil.
Variations on Parboiled Chicken
- Lemon Pepper Style: Add lemon slices and lemon pepper seasoning to the boiling water. Add lemon zest to the flour mixture.
- Spicy “Fire” Chicken: Add dried red chilies and hot sauce to the boiling water. Use cayenne and chili powder generously in the flour dredge.
- Garlic Butter Glazed: After frying, toss the crispy chicken in a mixture of melted butter, minced garlic, and parsley.
- The “Naked” Fry: If you are gluten-free, you can skip the batter entirely! Parboil the chicken, dry it well, and deep fry it “naked.” The skin will become incredibly crispy, almost like a chicken wing.
What to Serve with Parboiled Fried Chicken
This is classic soul food territory, so the sides should match the vibe.
- Macaroni and Cheese: Creamy, baked mac and cheese is the ultimate partner for crunchy chicken.
- Coleslaw: A vinegar-based or creamy slaw provides the acid needed to cut through the fried fat.
- Mashed Potatoes: Use the reserved chicken broth (from the boil) to make a gravy for your potatoes!
- Cornbread: Sweet, crumbly cornbread is a must.
- Hot Sauce & Honey: I love serving this with a bottle of hot sauce and a jar of honey on the table for dipping.
Storage and Reheating
Fried chicken is notoriously difficult to reheat, but because this meat was parboiled, it stays moister than usual.
- Fridge: Store in an airtight container lined with paper towels (to absorb moisture) for up to 3-4 days.
- Freezing: You can freeze the fried chicken for up to 2 months.
- Reheating:Do not microwave. Microwaving will make the skin soggy and rubbery.
- Air Fryer: Reheat at 375°F for 4-5 minutes. This restores the crunch perfectly.
- Oven: Place on a wire rack over a baking sheet and bake at 400°F for 10-15 minutes.
Final Thoughts
Parboiled Fried Chicken might seem like an extra step, but it is actually a shortcut to perfection. It removes the stress of monitoring internal temperatures and guarantees a juicy bite every single time.
Once you try this method, you will realize why so many grandmothers swore by it. It’s consistent, it’s flavorful, and it creates that picture-perfect golden crust we all crave.
So, get that water boiling and get ready for the best fried chicken of your life.
Happy Cooking! Chef Noah
Print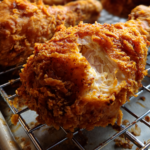
Parboiled Fried Chicken: The Secret to Juicy Meat and Ultra-Crispy Skin
- Total Time: 1 hour 10 minutes
- Yield: 6 Servings 1x
- Diet: Halal
Description
A fool-proof method for crispy fried chicken. Parboiling the chicken in seasoned water ensures juicy, fully cooked meat and a shorter frying time for extra crispy skin.
Ingredients
- 3 lbs Chicken Drumsticks or Wings
- 1 Onion (quartered)
- 4 cloves Garlic
- 2 tbsp Salt
- 2 cups All-Purpose Flour
- 1/2 cup Cornstarch
- 2 Eggs
- 1 tbsp Paprika
- 1 tsp Cayenne Pepper
- Oil for frying
Instructions
- Place chicken in a pot with onion, garlic, salt, and water. Simmer for 20 minutes.
- Remove chicken and let cool completely (pat dry).
- Heat oil to 375°F.
- Mix flour, cornstarch, and spices in one bowl; whisk eggs and milk in another.
- Dredge cooled chicken in flour, then egg, then flour again.
- Fry for 3-5 minutes until golden brown and crispy.
- Drain on a wire rack and serve.
Notes
- Cooling is Key: You must let the chicken cool and dry after boiling, otherwise the batter will not stick.
- Safety: This method guarantees no undercooked meat at the bone.
- Broth: Save the boiling water; it is now a rich chicken stock.
- Prep Time: 15 minutes
- Cook Time: 25 minutes
- Category: Dinner
- Method: Boil and Fry
- Cuisine: American / Soul Food
Nutrition
- Serving Size: 2 Pieces
- Calories: 420 kcal
- Sugar: 1g
- Sodium: 850mg
- Fat: 22g
- Saturated Fat: 5g
- Unsaturated Fat: 12g
- Trans Fat: 0g
- Carbohydrates: 24g
- Fiber: 1g
- Protein: 28g
- Cholesterol: 110mg
Keywords: Parboiled Fried Chicken, Pre-cooked Fried Chicken, Southern Fried Chicken Recipe, Crispy Chicken Drumsticks, Juicy Fried Chicken Hack, How to Parboil Chicken